Sno-Safe Snow Guards Installation
We suggest that snow guards be fastened in staggered rows throughout the entire roof, so they function as cleats, holding the snow evenly. If you need assistance in calculating the quantity and pattern for installation, use our online Calculator Here.
Sno-Safe Snow Guard Installation using Adhesive Sealant
- Mark the locations on the roof where the snow guards will be fastened
- Clean these locations with isopropyl alcohol and wipe off any residue
- Allow alcohol to fully evaporate and do not allow the alcohol to come into contact with the snow guard
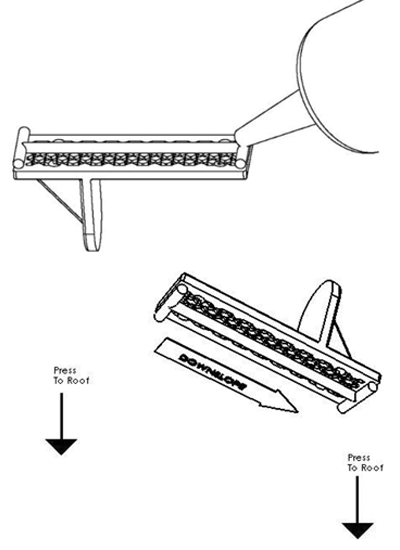
- Put a full bead of Adhesive Sealant on the underside of the snow guard
- Press the snow guard firmly to the roof
- Ensure the sealant squeezes out from all 4 edges of the snow guard and leave as is - Do Not Wipe.
Sno-Safe Snow Guard Installation using Screws
- Mark the locations on the roof where the snow guards will be fastened
- Apply Sealant to the base of the snow guard
- Press the snow guard firmly to the roof ensuring adhesive squeezes out from all 4 edges and leave as is - Do Not Wipe.
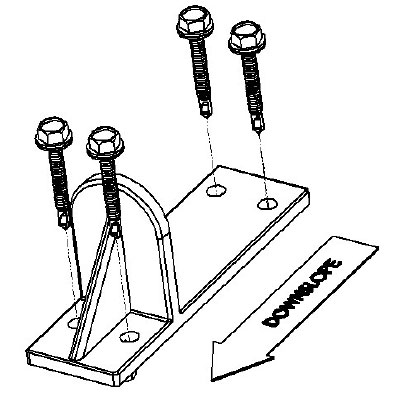
- Fasten snow guards using four (4) #12 self-drilling neoprene washer roofing screws. Exercise care to not over tighten the screws.
Sno-Safe Snow Guard Installation Videos
How to Install Sno-Safe Snow Guards Using Adhesive Sealant
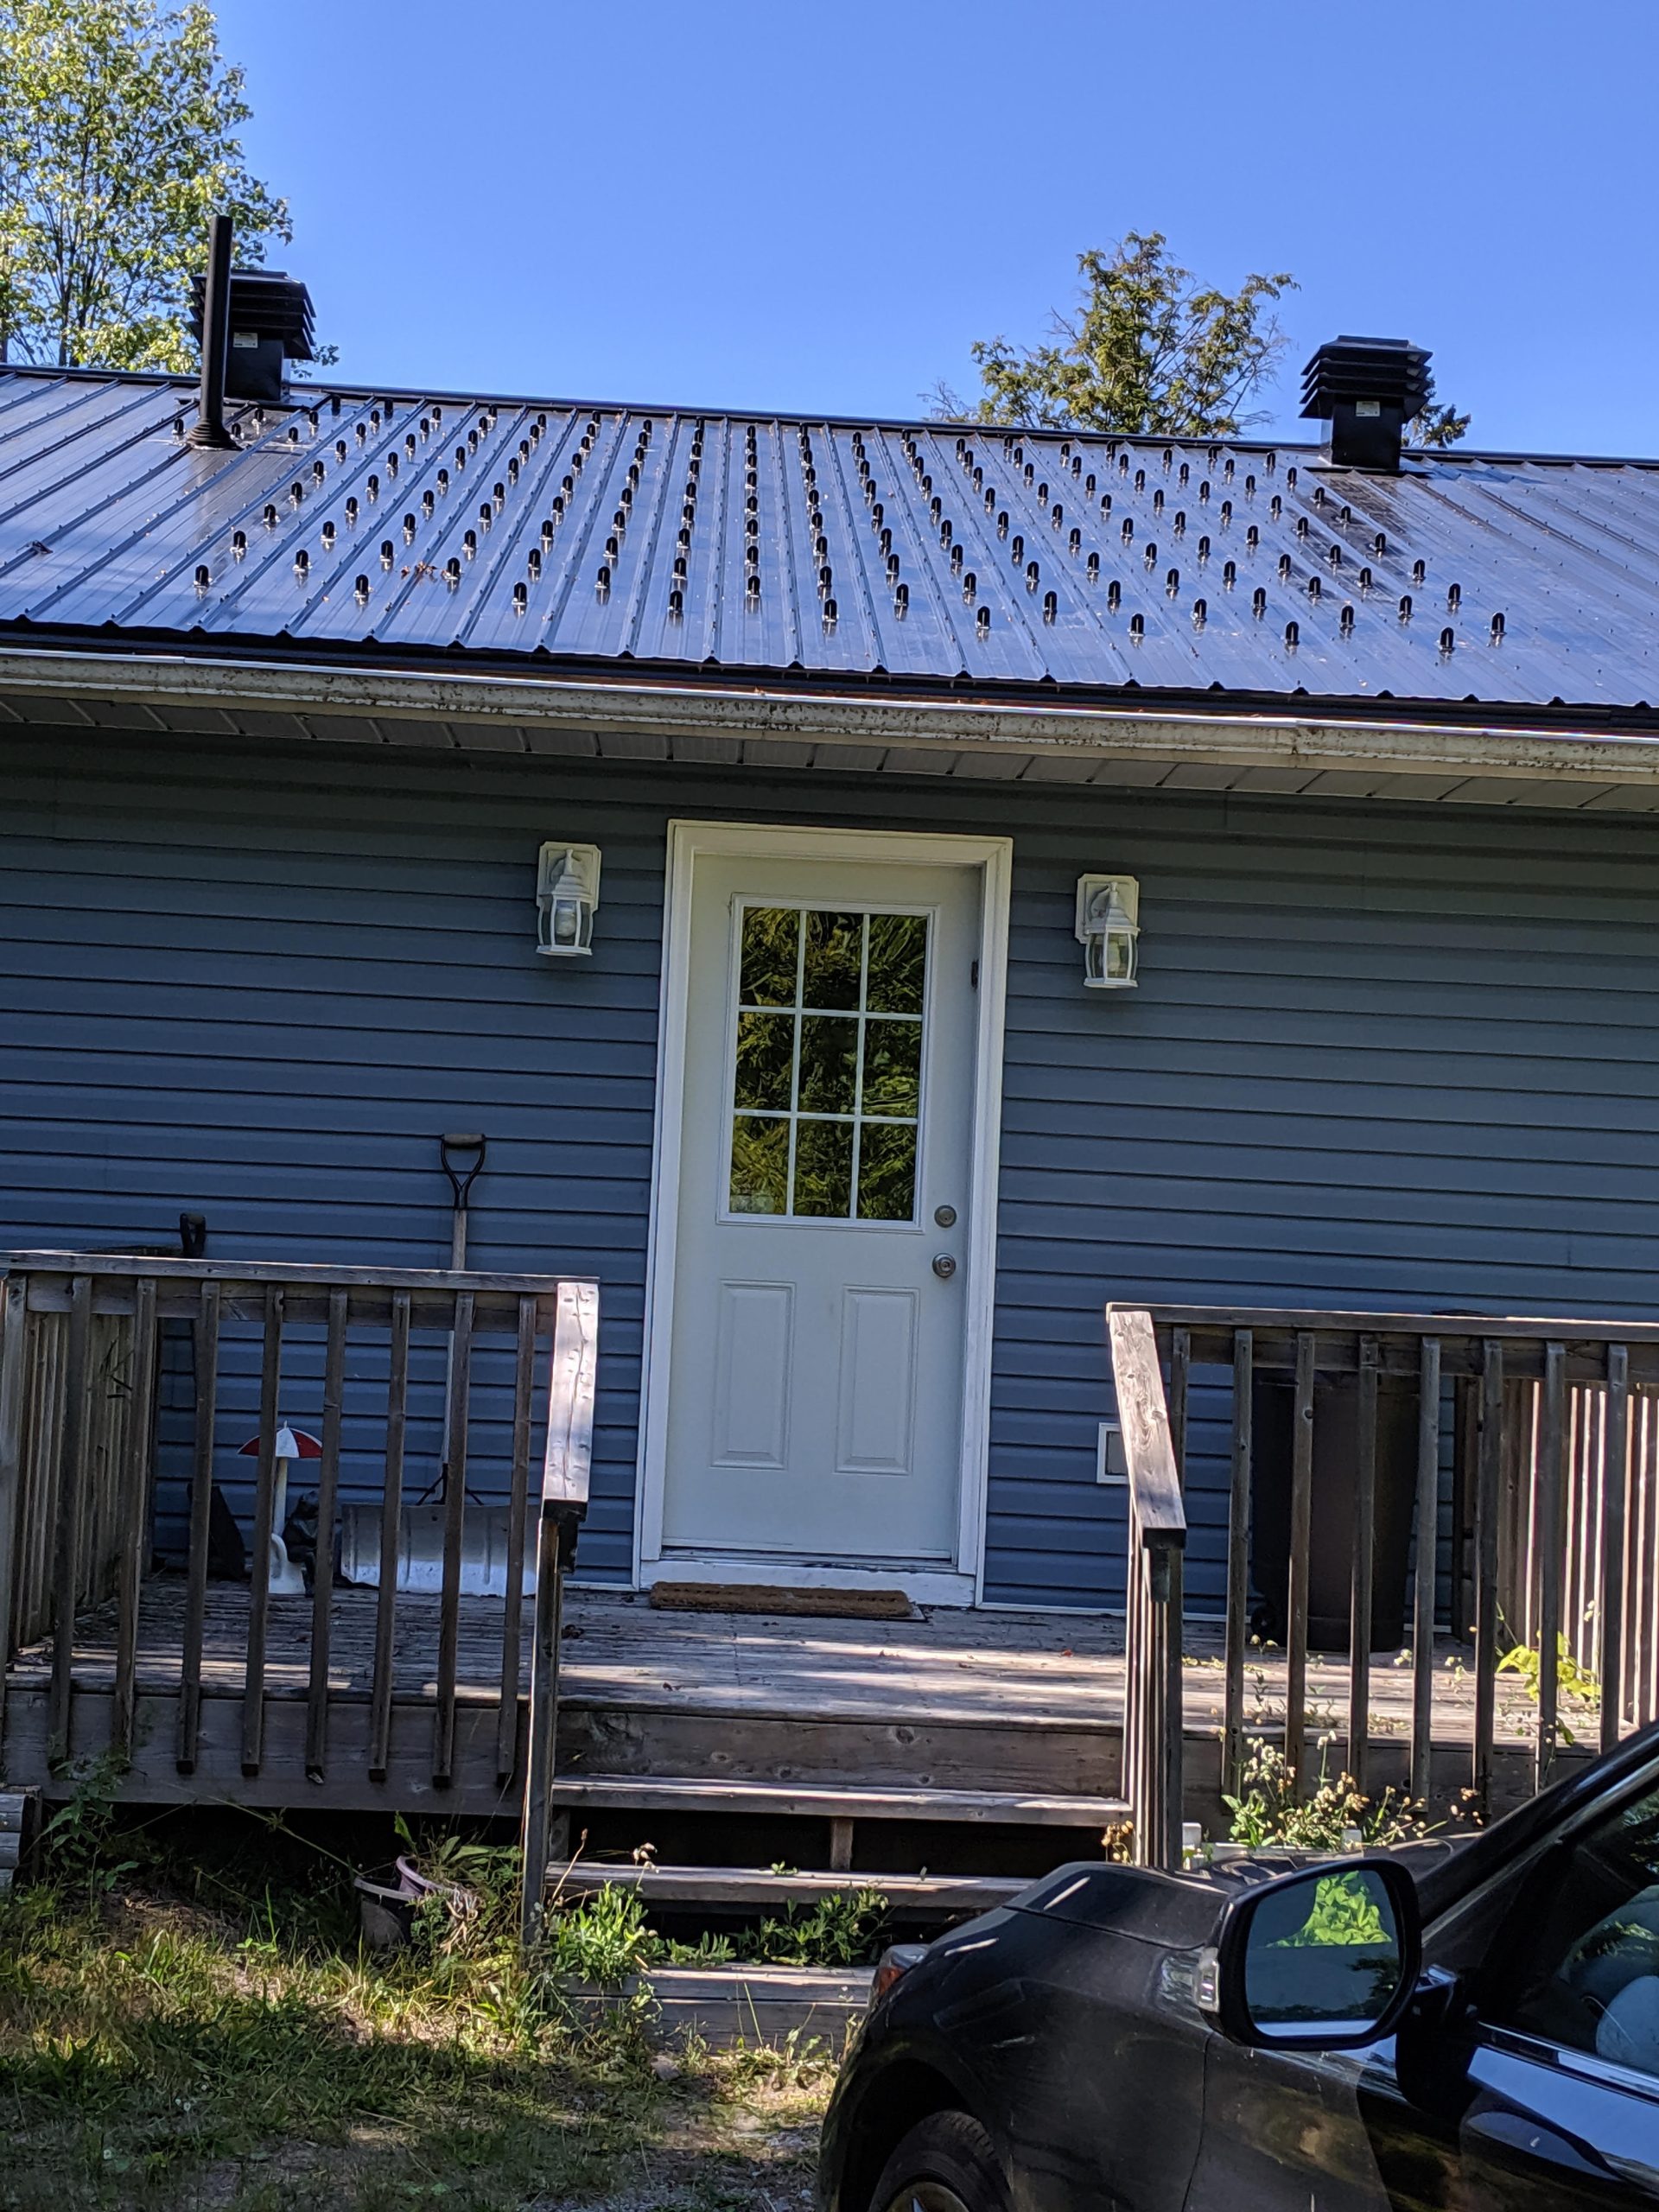
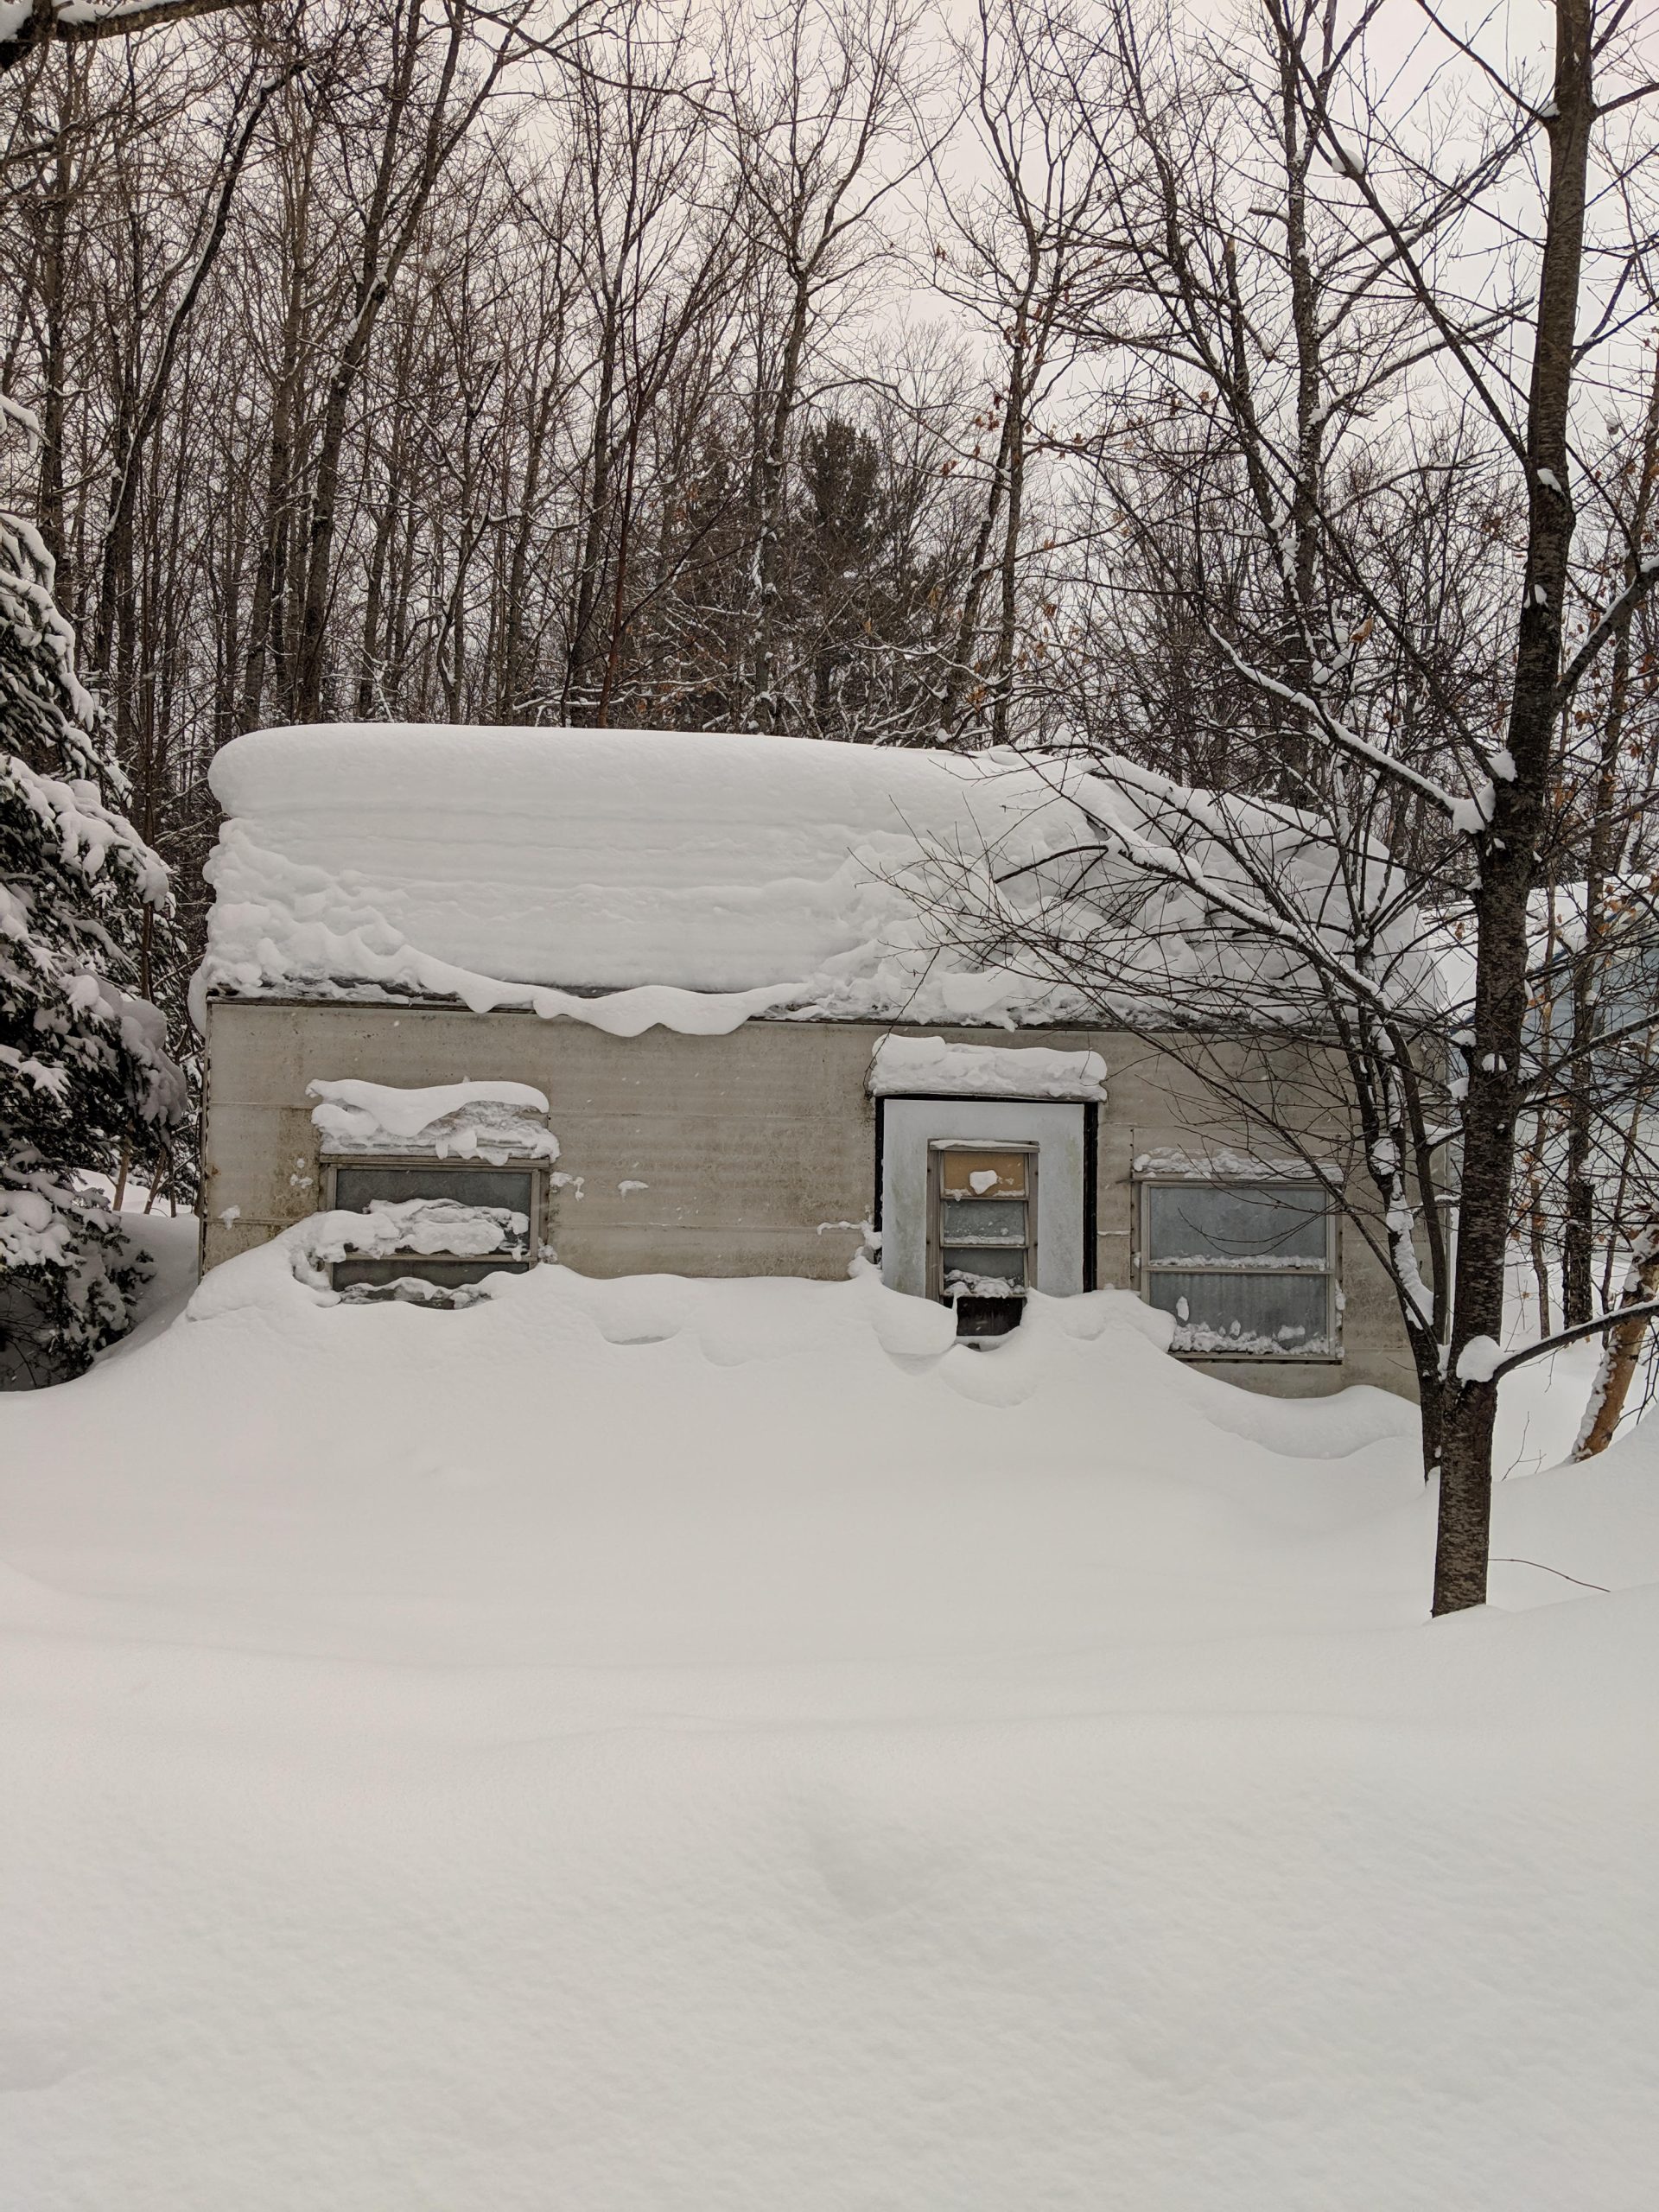
Fashioned for Heavy Snow Fall Accumulation. Photo from Northern Ontario.
Sno-Safe Snow Guards Installation over Door & Porch Area in correct pattern